搭建SpringMVC
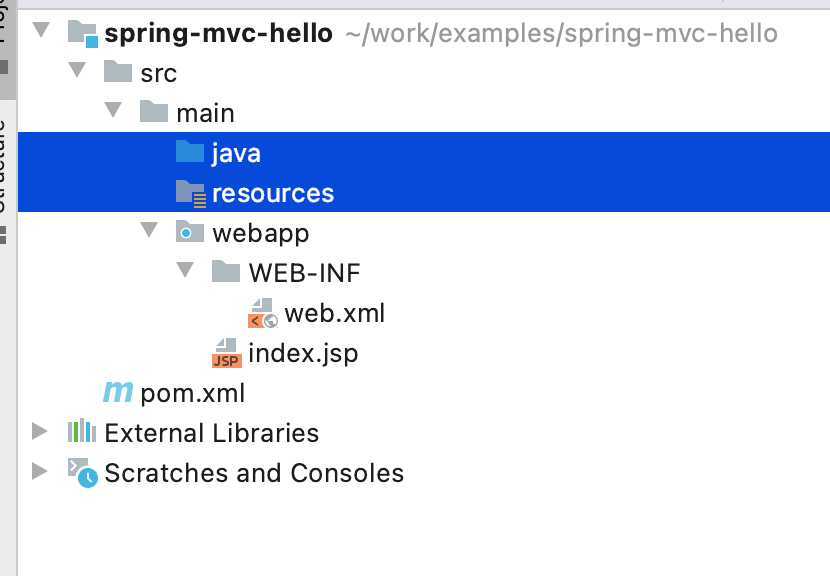
- 使用idea快速创建webapp项目

- 在pom.xml中添加依赖
1
2
3
4
5
6
7
8
9
10
11
12
13
14
|
<dependency>
<groupId>org.springframework</groupId>
<artifactId>spring-webmvc</artifactId>
<version>5.3.2</version>
</dependency>
<dependency>
<groupId>javax.servlet</groupId>
<artifactId>javax.servlet-api</artifactId>
<version>4.0.1</version>
<scope>compile</scope>
</dependency>
|
- 创建
java 和 resources 目录
- 创建controller
1
2
3
4
5
6
7
8
| @RestController
public class HelloController {
@GetMapping("/hello")
public Object hello() {
return "hello world";
}
}
|
- 编辑WEB-INF目录下的web.xml文件
1
2
3
4
5
6
7
8
9
10
11
12
13
14
15
16
17
18
19
20
21
22
23
24
25
26
27
28
29
30
31
32
33
34
35
36
37
38
39
40
41
42
43
44
45
46
47
48
49
50
51
52
53
54
55
| <!DOCTYPE web-app PUBLIC
"-//Sun Microsystems, Inc.//DTD Web Application 2.3//EN"
"http://java.sun.com/dtd/web-app_2_3.dtd" >
<web-app version="3.0" xmlns="http://java.sun.com/xml/ns/javaee"
xmlns:xsi="http://www.w3.org/2001/XMLSchema-instance"
xsi:schemaLocation="http://java.sun.com/xml/ns/javaee
http://java.sun.com/xml/ns/javaee/web-app_3_0.xsd">
<display-name>Archetype Created Web Application</display-name>
<servlet>
<servlet-name>dispatcher</servlet-name>
<servlet-class>org.springframework.web.servlet.DispatcherServlet</servlet-class>
<init-param>
<param-name>contextConfigLocation</param-name>
<param-value>classpath:springContext.xml</param-value>
</init-param>
<load-on-startup>1</load-on-startup>
</servlet>
<servlet-mapping>
<servlet-name>dispatcher</servlet-name>
<url-pattern>/</url-pattern>
</servlet-mapping>
<context-param>
<param-name>contextConfigLocation</param-name>
<param-value>classpath:springContext.xml</param-value>
</context-param>
<listener>
<listener-class>org.springframework.web.context.ContextLoaderListener</listener-class>
</listener>
<filter>
<description>演示过滤器的注入</description>
<filter-name>TestFilter</filter-name>
<filter-class>cn.idea360.mvc.filter.TestFilter</filter-class>
</filter>
<filter-mapping>
<filter-name>TestFilter</filter-name>
<url-pattern>/*</url-pattern>
</filter-mapping>
</web-app>
|
- 创建
springContext.xml
根据 web.xml 中的配置,我们在 resources 目录下创建 springContext.xml , 当然也可以根据
<param-value>/WEB-INF/springContext.xml</param-value> 在WEB-INF下创建
1
2
3
4
5
6
7
8
9
10
11
12
13
14
15
16
17
18
19
20
21
22
23
24
| <beans xmlns="http://www.springframework.org/schema/beans"
xmlns:xsi="http://www.w3.org/2001/XMLSchema-instance"
xmlns:context="http://www.springframework.org/schema/context"
xmlns:mvc="http://www.springframework.org/schema/mvc"
xsi:schemaLocation="
http://www.springframework.org/schema/beans
http://www.springframework.org/schema/beans/spring-beans.xsd
http://www.springframework.org/schema/context
http://www.springframework.org/schema/context/spring-context.xsd
http://www.springframework.org/schema/mvc
http://www.springframework.org/schema/mvc/spring-mvc.xsd">
<context:component-scan base-package="cn.idea360.mvc"/>
<mvc:annotation-driven/>
<bean class="org.springframework.web.servlet.view.InternalResourceViewResolver">
<property name="prefix" value="/WEB-INF/jsp/"/>
<property name="suffix" value=".jsp" />
</bean>
</beans>
|
-
配置 tomcat 并启动, 如果没有 tomcat 可以在插件中添加
-
测试api请求
1
| curl http://localhost:8080/hello
|
过滤器示例
1
2
3
4
5
6
7
8
9
10
11
12
13
14
15
| public class TestFilter implements Filter {
@Override
public void init(FilterConfig filterConfig) throws ServletException {
}
@Override
public void doFilter(ServletRequest servletRequest, ServletResponse servletResponse, FilterChain filterChain) throws IOException, ServletException {
filterChain.doFilter(servletRequest, servletResponse);
}
@Override
public void destroy() {
}
}
|
有参构造bean注入
定义bean1
1
2
3
4
5
6
7
8
9
10
11
12
| public class UserService {
private String name;
public UserService(String name) {
this.name = name;
}
public void show() {
System.out.println("name=" + name);
}
}
|
定义bean2
1
2
3
4
5
6
7
8
9
10
11
12
13
14
15
16
17
18
19
20
21
22
23
24
25
26
27
28
29
30
31
32
33
34
| public class KafkaClient {
private String servers;
private String topic;
public KafkaClient(Map<String, Object> configs) {
this.servers = String.valueOf(configs.get("bootstrap.servers"));
}
public KafkaClient(Properties properties) {
this.servers = properties.getProperty("bootstrap.servers");
}
public KafkaClient(KafkaConfig kafkaConfig) {
this.servers = kafkaConfig.getServers();
}
public void setTopic(String topic) {
this.topic = topic;
}
public void show() {
System.out.println("servers=" + servers + "; topic=" + topic);
}
}
|
对象参数
1
2
3
4
5
6
7
8
9
10
11
12
| public class KafkaConfig {
private String servers;
public String getServers() {
return servers;
}
public void setServers(String servers) {
this.servers = servers;
}
}
|
在springContext.xml中注入bean
1
2
3
4
5
6
7
8
9
10
11
12
13
14
15
16
17
18
19
20
21
22
23
24
25
26
27
28
29
30
31
32
33
34
35
36
37
38
|
<bean id="userService" class="cn.idea360.mvc.service.UserService">
<constructor-arg name="name" value="admin"/>
</bean>
<bean id="kafkaProducerProperties1" class="java.util.HashMap">
<constructor-arg>
<map>
<entry key="bootstrap.servers" value="localhost:9092"/>
</map>
</constructor-arg>
</bean>
<bean id="kafkaProducerProperties2" class="java.util.HashMap">
<constructor-arg>
<props>
<prop key="bootstrap.servers">127.0.0.1:9092</prop>
</props>
</constructor-arg>
</bean>
<bean id="kafkaConfig" class="cn.idea360.mvc.service.KafkaConfig">
<property name="servers" value="127.0.0.1"/>
</bean>
<bean id="kafkaClient" class="cn.idea360.mvc.service.KafkaClient">
<constructor-arg ref="kafkaConfig"/>
<property name="topic" value="topic-test"/>
</bean>
|
测试
1
2
3
4
5
6
7
8
9
10
11
12
13
14
15
| public class BeanTest {
public static void main(String[] args) {
ClassPathXmlApplicationContext context = new ClassPathXmlApplicationContext("springContext.xml");
UserService userService = context.getBean("userService", UserService.class);
userService.show();
KafkaClient kafkaClient = context.getBean(KafkaClient.class);
kafkaClient.show();
}
}
|
最后
本文到此结束,感谢阅读。如果您觉得不错,请关注公众号【当我遇上你】,您的支持是我写作的最大动力。
参考